For a long time I used ESXi to virtualize my local network services, suddenly one day I ran out of memory. The Intel NUC I was using had 16G of memory which should have been plenty but was exhausted by the number of virtual machines I was running. After dismissing a hardware upgrade due to cost I discovered Proxmox and its first class LXC container support. Suddenly my 16G of memory was ample even double the services running.
Creating a new container, I usually ran a few commands before SSH was available (my preferred ArchLinux image does not have it enabled by default) and subsequently executed an Ansible playbook. This grew tiresome over the last few years but I never did it enough to worry about automating it. Well now in 2021 I’m preparing for a full Proxmox rebuild due to hardware changes and decided to look into making things a little easier.
The following is a guide on how I setup my custom ArchLinux LXC template to be deployed at a moments notice.
Create LXC Container
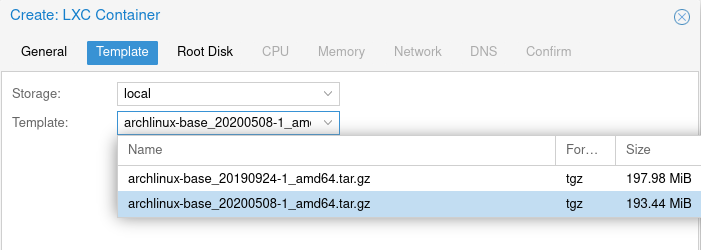
First create your LXC container as you normally would. I personally prefer ArchLinux as that is what I’m use too:
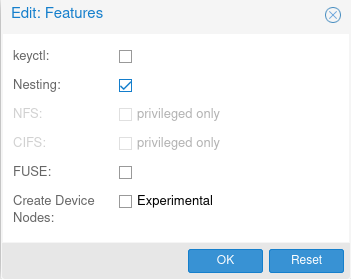
Ensure you enable nesting under the options:
Configure ArchLinux
Modify /etc/locale.gen and uncomment “en_US.UTF-8 UTF-8”:
#en_SG.UTF-8 UTF-8
#en_SG ISO-8859-1
en_US.UTF-8 UTF-8
#en_US ISO-8859-1
#en_ZA.UTF-8 UTF-8
Set that locale in /etc/locale.conf and generate:
echo 'LANG=en_US.UTF-8' > /etc/locale.conf
locale-gen
Setup pacman-key and populate:
pacman-key --init && pacman-key --populate archlinuxUncomment a relevant mirror in /etc/pacman.d/mirrorlist (in my case Australian):
## Arch Linux repository mirrorlist
## Generated on 2020-04-11
##

## Worldwide
#Server = http://mirrors.evowise.com/archlinux/$repo/os/$arch
#Server = http://mirror.rackspace.com/archlinux/$repo/os/$arch
#Server = https://mirror.rackspace.com/archlinux/$repo/os/$arch

## Australia
Server = https://mirror.aarnet.edu.au/pub/archlinux/$repo/os/$arch
#Server = http://archlinux.mirror.digitalpacific.com.au/$repo/os/$arch
#Server = https://archlinux.mirror.digitalpacific.com.au/$repo/os/$arch
First retrieve the latest archlinux-keyring to ensure keys are up to date:
pacman -Sy archlinux-keyringPerform a full system upgrade to bring everything up to date. Additionally installing:
- vim - for easier configuration file modifications
- pacman-contrib - to resolve conflicts
- sudo - for setup later
pacman -Su vim pacman-contrib sudoResolve any pacnew files with pacdiff, keeping the base image nice and clean. Configure your local timezone:
ln -sf /usr/share/zoneinfo/Australia/State /etc/localtimeConfigure System
Change root password with passwd if required (Note: This password is overridden each time the container is created inside Proxmox).
Create sudo group:
groupadd sudoAdd a regular user account:
useradd -G users,sudo -s /bin/bash -m usernameChange the password with passwd username. Next update the sudoers file by running visudo and un-commenting the following line:
## Uncomment to allow members of group sudo to execute any command
%sudo   ALL=(ALL) ALL
This will allow the regular account sudo access. Add your SSH key to the authorized_keys file:
mkdir /home/username/.ssh
cp authorized_keys /home/username/.ssh/
chown -R username:username /home/username/.ssh
chmod 700 /home/username/.ssh
chmod 600 /home/username/.ssh/authorized_keys
Check SSHD settings are correct and secure in /etc/ssh/sshd_config. Do not allow password authentication or root access:
PermitRootLogin no
PasswordAuthentication no
UserPAM no
AllowUsers username
Enable SSHD on startup:
systemctl enable sshdSecurity Settings
Some extra security settings that I apply. /dev/null several files that may contain sensitive information:
ln -sf /dev/null /root/.viminfo
ln -sf /dev/null /root/.bash_history
su - username
ln -sf /dev/null /home/username/.viminfo
ln -sf /dev/null /home/username/.bash_history
Install common utilities
Install utilities I find myself using on most machines:
pacman -S base-devel htop git vim curl wget reflectorSetup Reflector to keep mirrorlist up to date. Append settings too /etc/xdg/reflector/reflector.conf:
--save /etc/pacman.d/mirrorlist
--country Australia
--protocol https
--latest 5
Enable the systemd timer as described in the wiki entry: https://wiki.archlinux.org/index.php/Reflector. Add NoExtract to /etc/pacman.conf to stop pacnew entries for mirrorlist. Reflector now takes care of this for us.
NoExtract = etc/pacman.d/mirrorlistBugs
Due to this issue for some reason systemd-journald-audit.socket fails causing systemd to report a degraded system. Temporary fix is to:
systemctl mask systemd-journald-audit.socketI’m still not sure why this happens or is required.
Cleanup
Remove any .ssh directory for the root user to ensure SSH keys do not exist:
rm -r /root/.sshRevert /etc/resolve.conf to ensure current settings do not persist.
Once you are happy with your base image, shutdown the container.
Creating the template
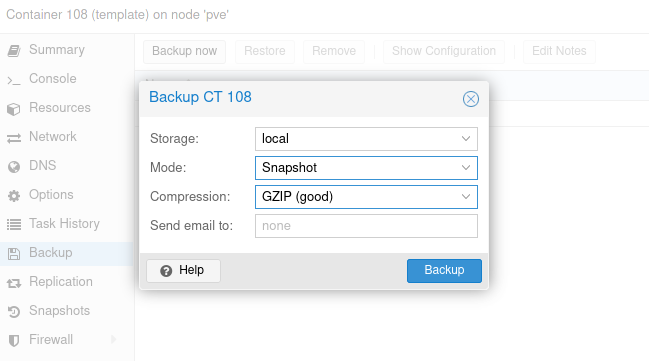
Back in your Proxmox interface select the container then “Backup” and select “Backup Now”. Ensure you select “GZIP” compression and hit “Backup”:
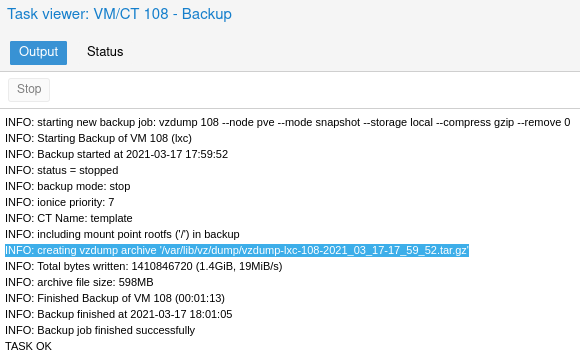
This may take a few minutes. In the output of status window you can see the path to the backup file:
Once complete you can copy the file over to your Proxmox templates directory /var/lib/vz/template/cache/ via the shell feature with:
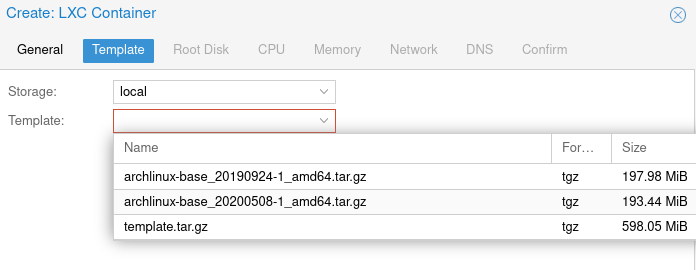
cp /var/lib/vz/dump/vzdump-lxc-[CT#]-[TIMESTAMP].tar.gz /var/lib/vz/template/cache/template.tar.gzYou should now see your new template when you go to create a new container:
That’s it! Your new container should start with your pre-configured base image making things a little easier.
Every year I refresh the base image in case I ever need to re-build a container.
Notes
- Specifying the root password in the Proxmox interface will overwrite the base image password
- Make sure you enable “nesting” each time you create a container
- Updating the base image is as simple as creating a new container, updating and executing the backup procedure again